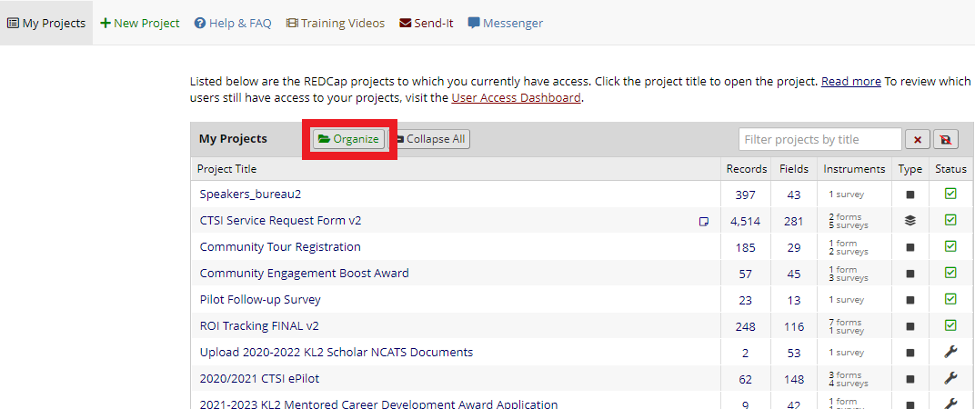
With the recent REDCap upgrade users are now able to create folders and organize the list of projects they have access to. To create a project folder, navigate to the “My Projects” tab and click the green “Organize” button.
The following popup will allow users to define project folders and organize projects into groups. Project folders can be created with custom names and colors. Once the folders are created, they can be reordered by dragging them in the left-hand table and edited at any point.
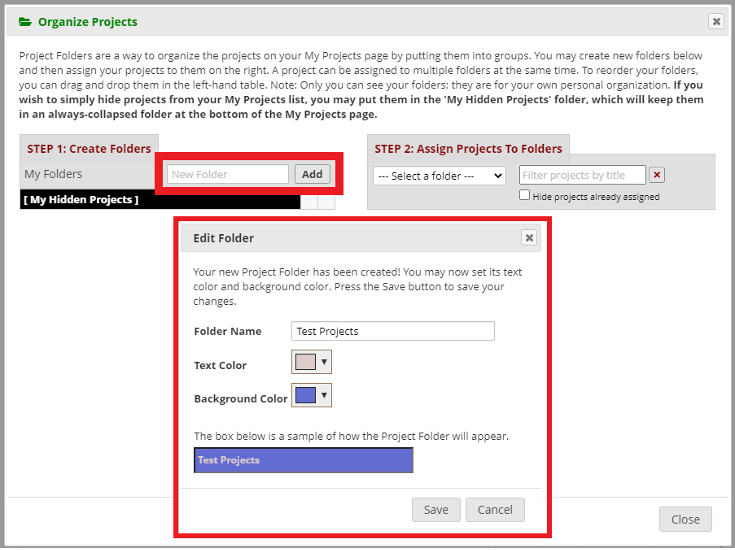
Users can then assign projects—both active and archived ones—to a category. There are no limits to the number of folders you may create, and a project can be assigned to multiple folders at the same time.
Utilizing project folders will not affect or alter projects. Organizing projects is unique for each REDCap user, meaning one user’s approach to organization will not change someone else’s if both have access to the same project. Project organization will also not impact the data contained in a project in any way.
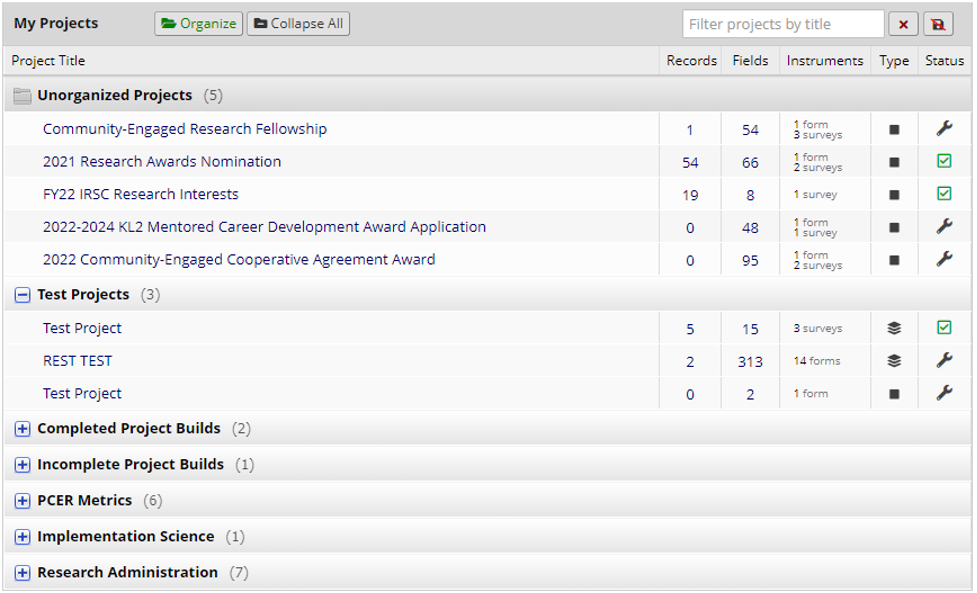
Each folder is collapsible, which allows for uncluttered navigation as seen in the following image. In addition, the order of projects can be changed by dragging and dropping the folders in the “Organize Projects” popup.